Kit, catalogue and rentals
Printing QR labels for your kit
Giving each piece a code and printing labels on Avery sheets.
Each piece of kit can have a QR code label, so it can be scanned out to a job and back in with a phone.
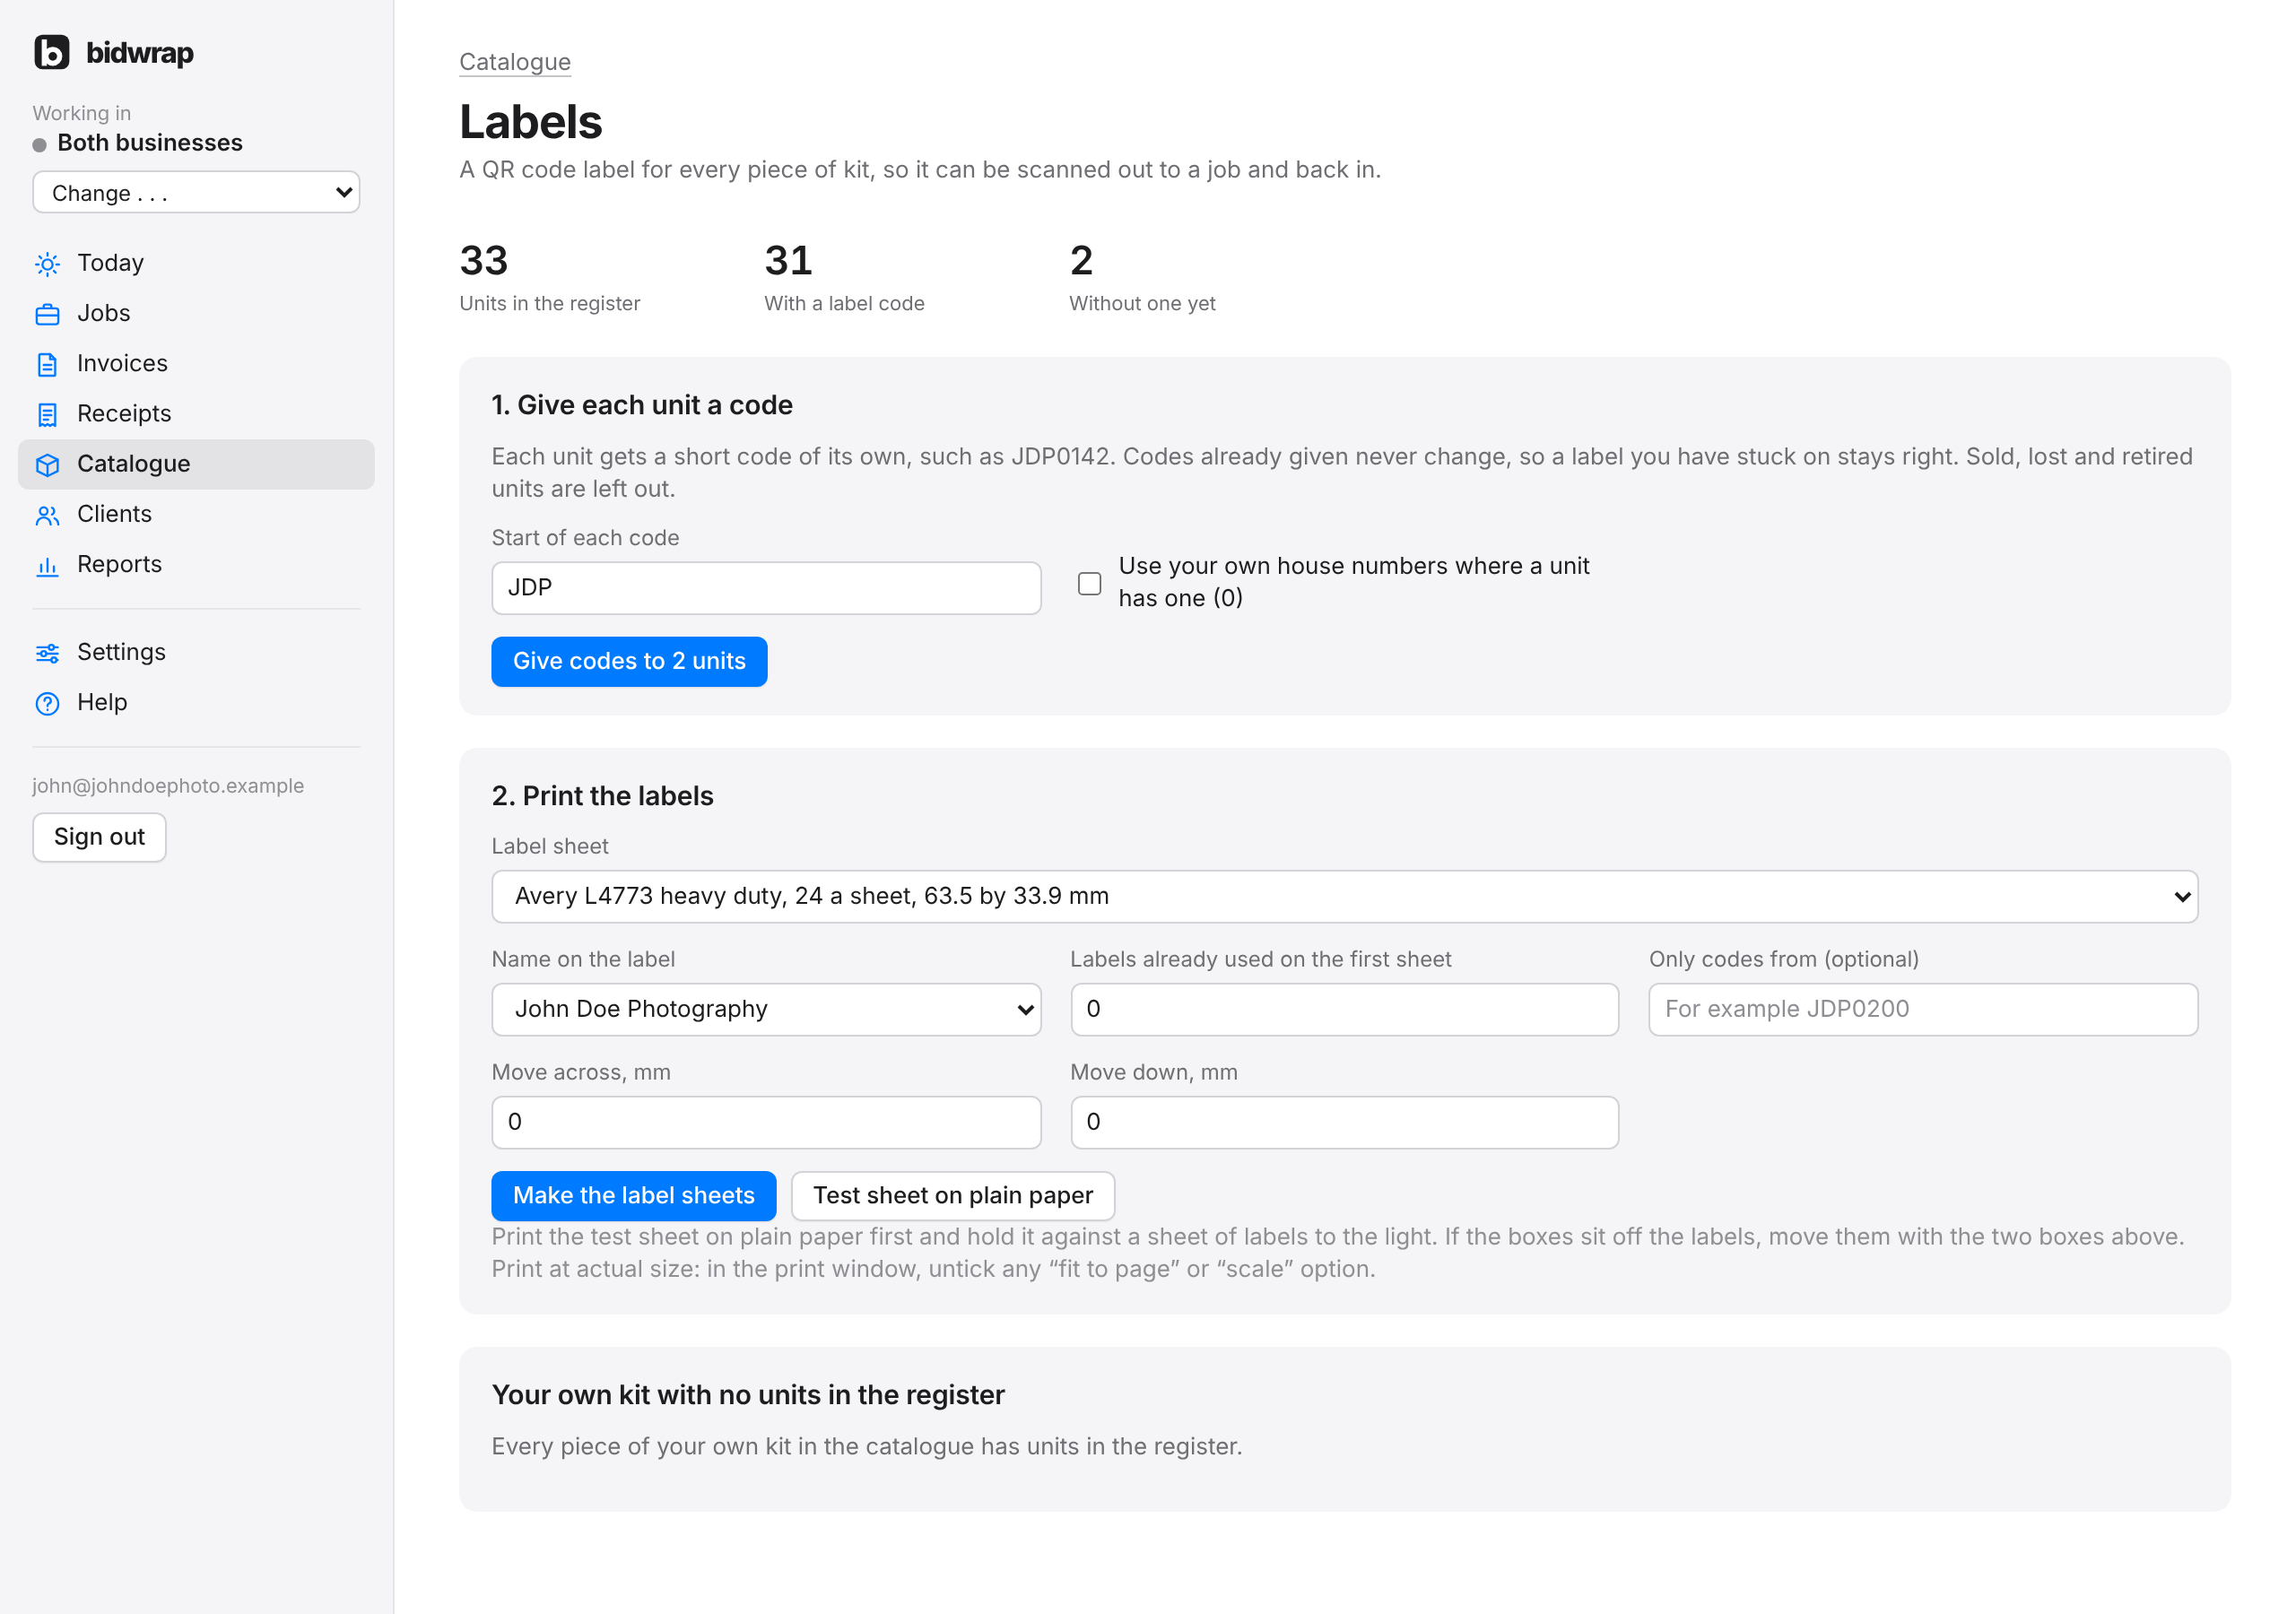
1. Give each unit a code
- Click Catalogue in the side menu.
- Click More, top right, then Labels.
- Check the Start of each code. It starts as the initials of your business name, or the letters your codes already use. You can change it, up to six characters.
- Tick Use your own house numbers if your units already have numbers of yours.
- Click Give codes to the units without one.
Codes already given never change, so a label you have stuck on stays right. Sold, lost and retired units are left out.
2. Print a test sheet
- Choose the Label sheet: Avery L4773, 24 a sheet, or Avery L7651, 65 a sheet.
- Click Test sheet on plain paper.
- Print it on plain paper at actual size. In the print window, untick any fit to page or scale option.
- Hold it against a sheet of labels, up to the light.
- If the boxes sit off the labels, change Move across and Move down, in millimetres.
3. Print the labels
- Choose the Name on the label.
- If you have used some labels on the sheet already, type how many in Labels already used on the first sheet.
- To print only newer codes, type the first one in Only codes from.
- Click Make the label sheets.
- Print the PDF onto the label sheets, at actual size.
TipCount used labels from the top left, across each row. The new ones print on the next free spaces.